Test token swap
This test scenario walks you through the process of acquiring test INS tokens and swapping them to test XNS coins on Insolar TestNet.
Warning
Do not send real INS tokens from the main Ethereum network to Insolar MainNet during the testing period.
What you will need
You need to create two wallets:
Ethereum wallet that supports Ethereum test networks (Ropsten in particular) and custom tokens. This test scenario uses MetaMask as an example.
Insolar Wallet in which you can store XNS coins that are native for Insolar MainNet.
Additionally, you need to understand the following:
What coins and tokens are. Coin is a native cryptocurrency of any blockchain and token is a unit of value that may be built on top of it. Coins operate independently, while tokens have specific uses. On the Ethereum network, the coin is the ether (ETH) and the token standard (upon which the INS token is built) is ERC-20. Test tokens and coins are those that operate in test networks. For testing purposes, we are going to use the Ropsten test network.
What a crypto faucet is. The faucet is a quick and easy way of creating and distributing test coins and tokens on test networks.
What a token contract is. Essentially, a token contract is a smart contract that contains a map of account addresses and their balances. The unit of the balance is the token. When tokens are transferred from one account to another, the token contract updates balances of both accounts.
Test scenario overview
To grasp what you will be doing, take a look at the steps of the test scenario:
Create a MetaMask wallet, switch to Ropsten test network inside it, and add the INS custom token.
Get Ropsten test ETH coins.
Swap the coins to test INS tokens using the INS token contract.
Create a wallet in Insolar Wallet and, automatically, receive a migration address.
Send the test INS tokens from the MetaMask wallet to the migration address. They will automatically swap to XNS native coins and appear in Insolar Wallet.
All the above steps are described in detail in subsequent sections.
Creating and setting up Ethereum wallet
To create and set up a MetaMask Ethereum wallet:
Go to metamask.io and add its extension to your browser.
Open the extension, click Get Started, Create a Wallet, and agree or disagree to help MetaMask improve itself.
Create a new password, confirm it, and agree to the “Terms of Use”.
Reveal the backup phrase, copy it, and click Next.
Click the words of the backup phrase in correct order and then click Confirm.
Receive congratulations from MetaMask and click All Done. You will see the wallet’s user interface.
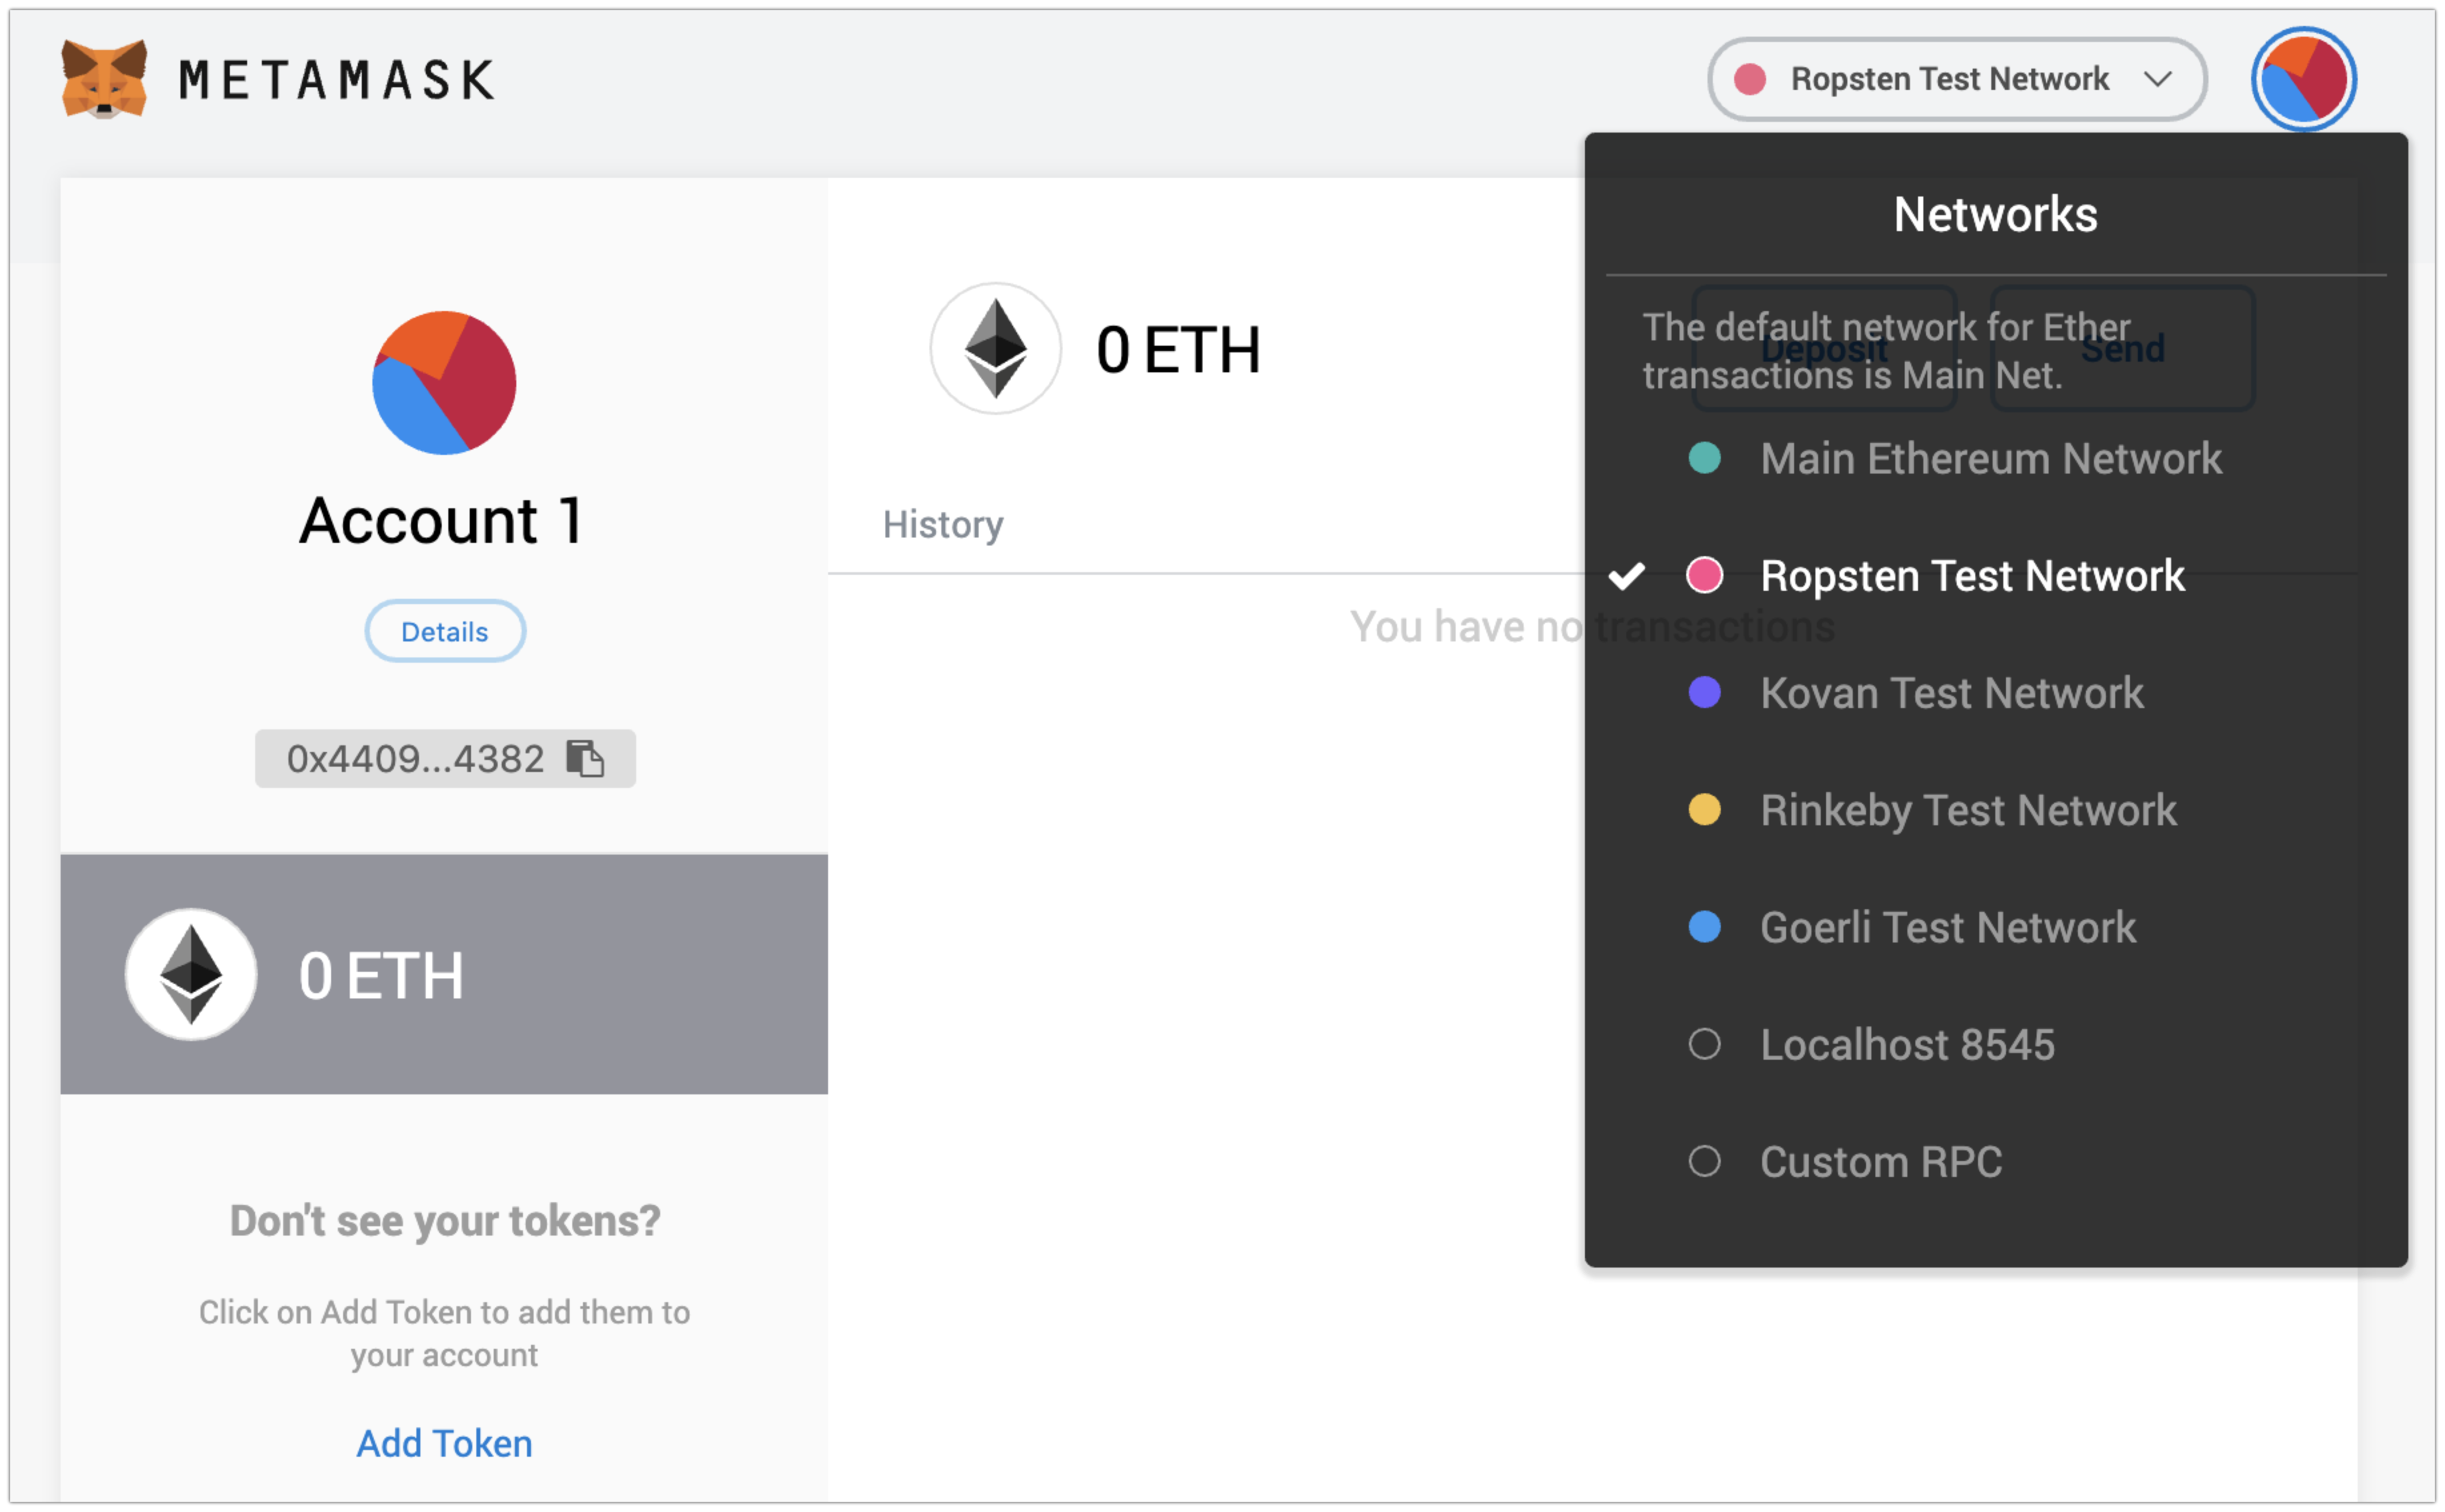
In the top right corner, select Ropsten Test Network from the drop-down list:
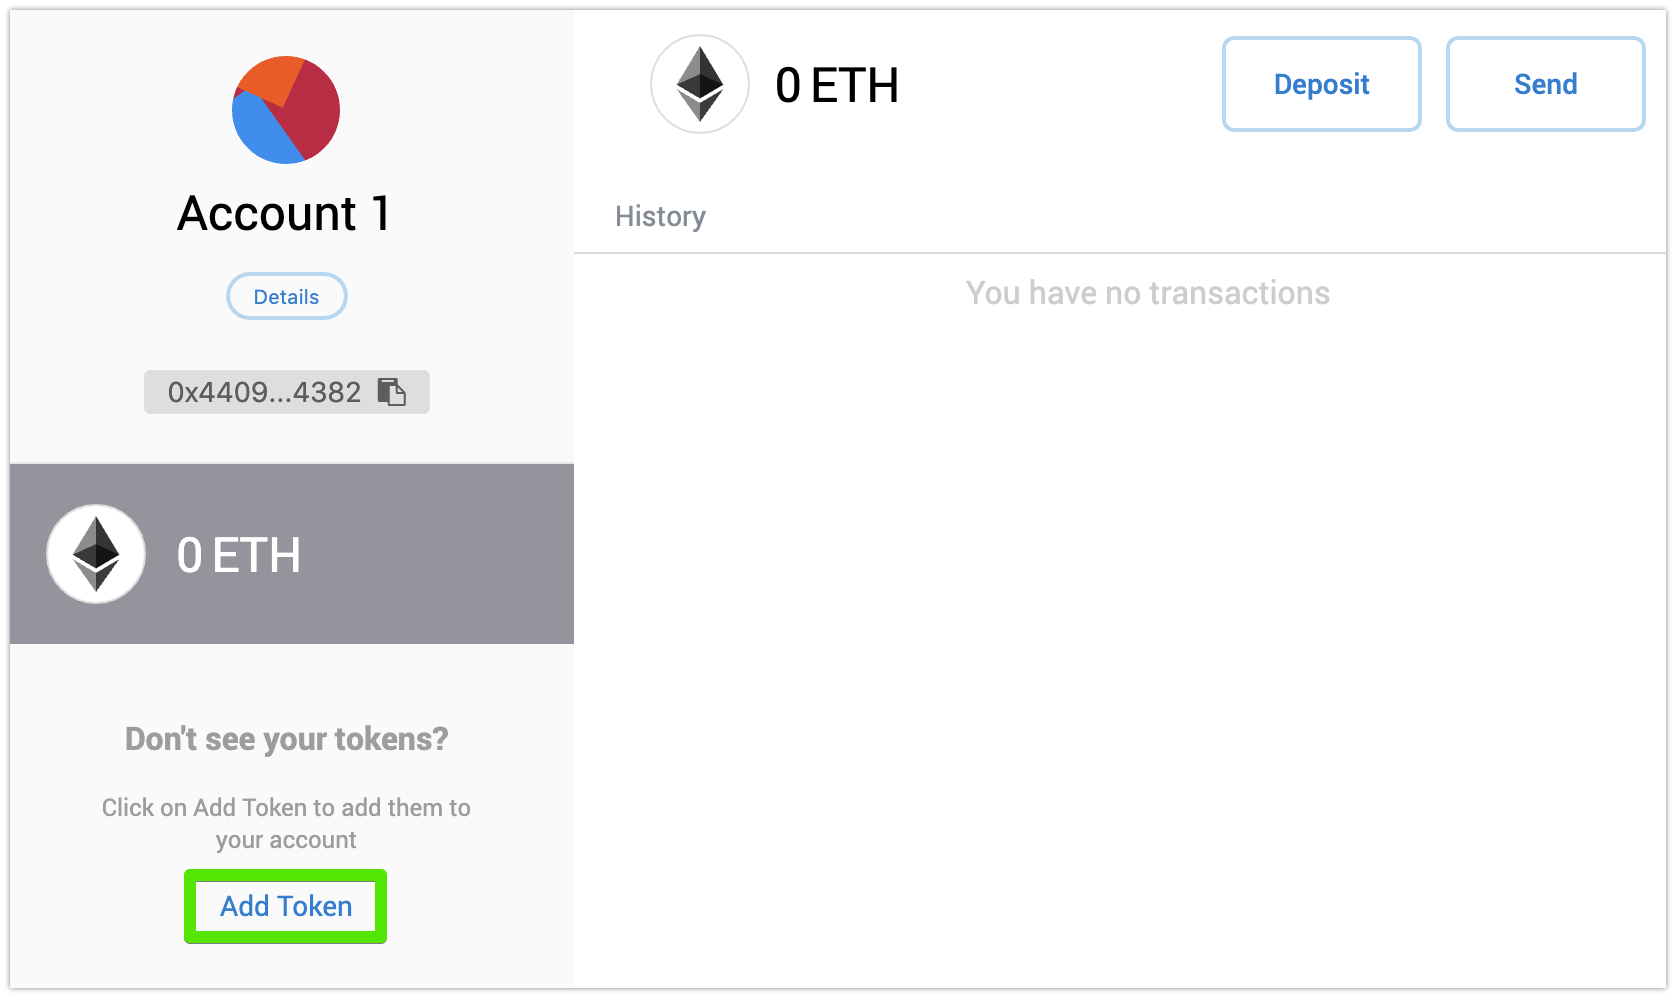
In the bottom left corner, click Add Token:
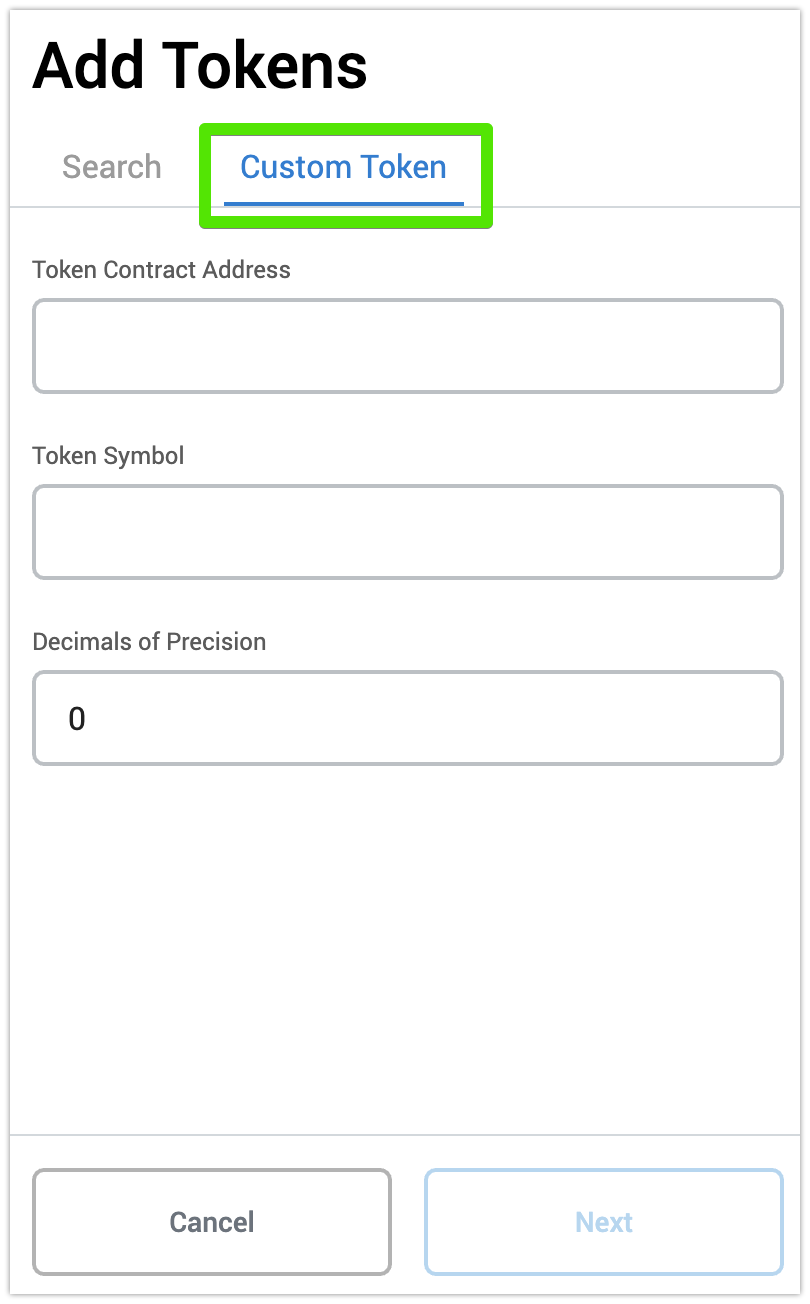
On the Add Tokens screen, open the Custom Token tab:
Copy the INS token contract address – click the copy icon
 in the right corner of the following code block:
0x7e94f2be613c6846c40325b0f2712269a0d61d10In the Token Contract Address field, paste the copied INS token contract address:
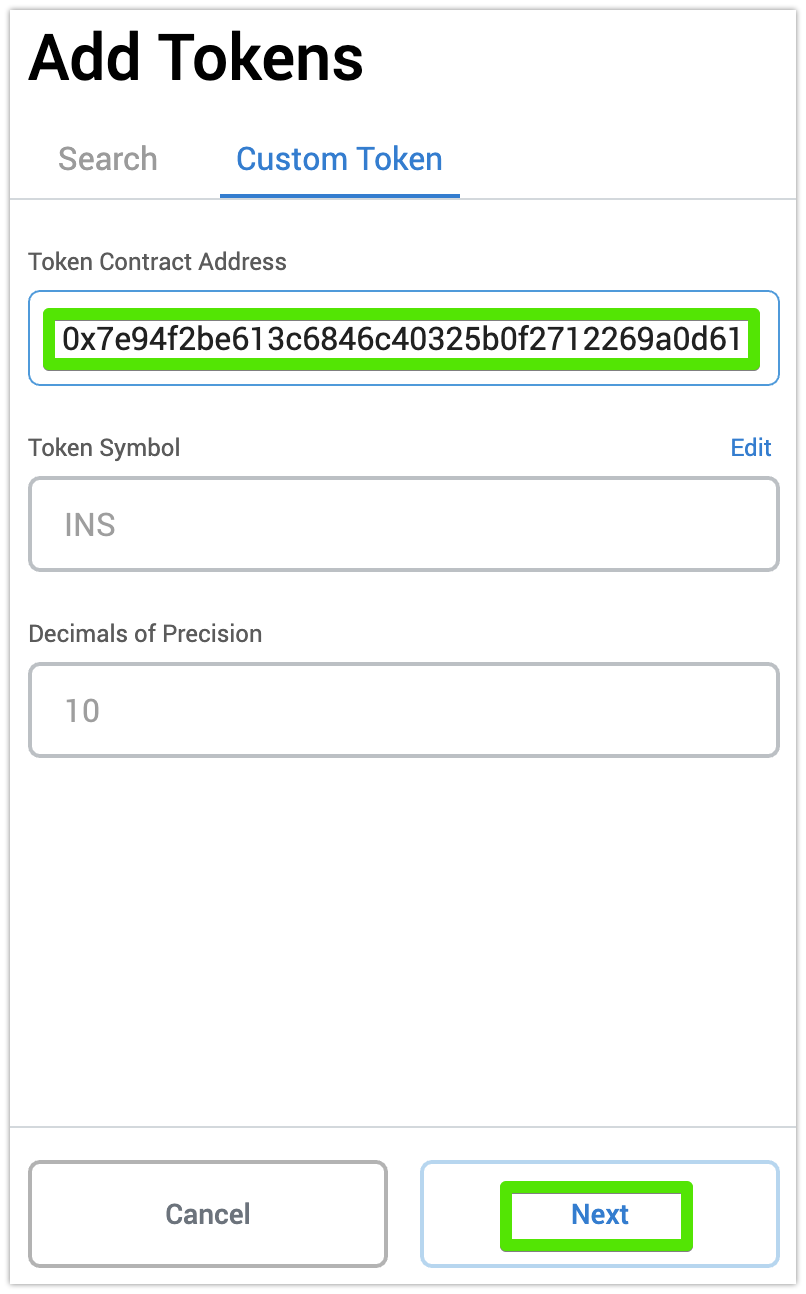
MetaMask will find the INS token symbol and decimals of precision for you. Click Next.
On the next screen, click Add Tokens:
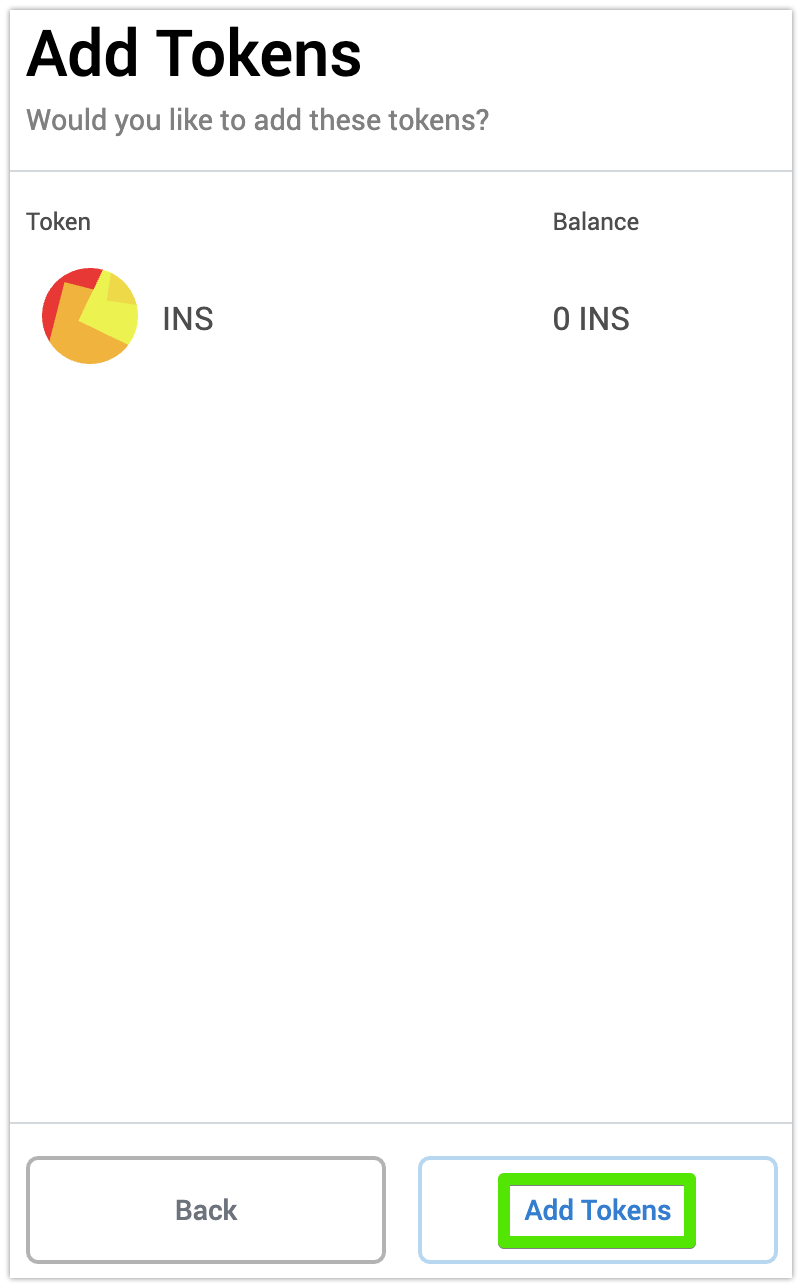
With that, the MetaMask wallet is set up to operate the test ETH coins and INS tokens:
Acquiring test ETH coins and swapping them to test INS tokens
To acquire, first, test ETH, then swap them to test INS tokens:
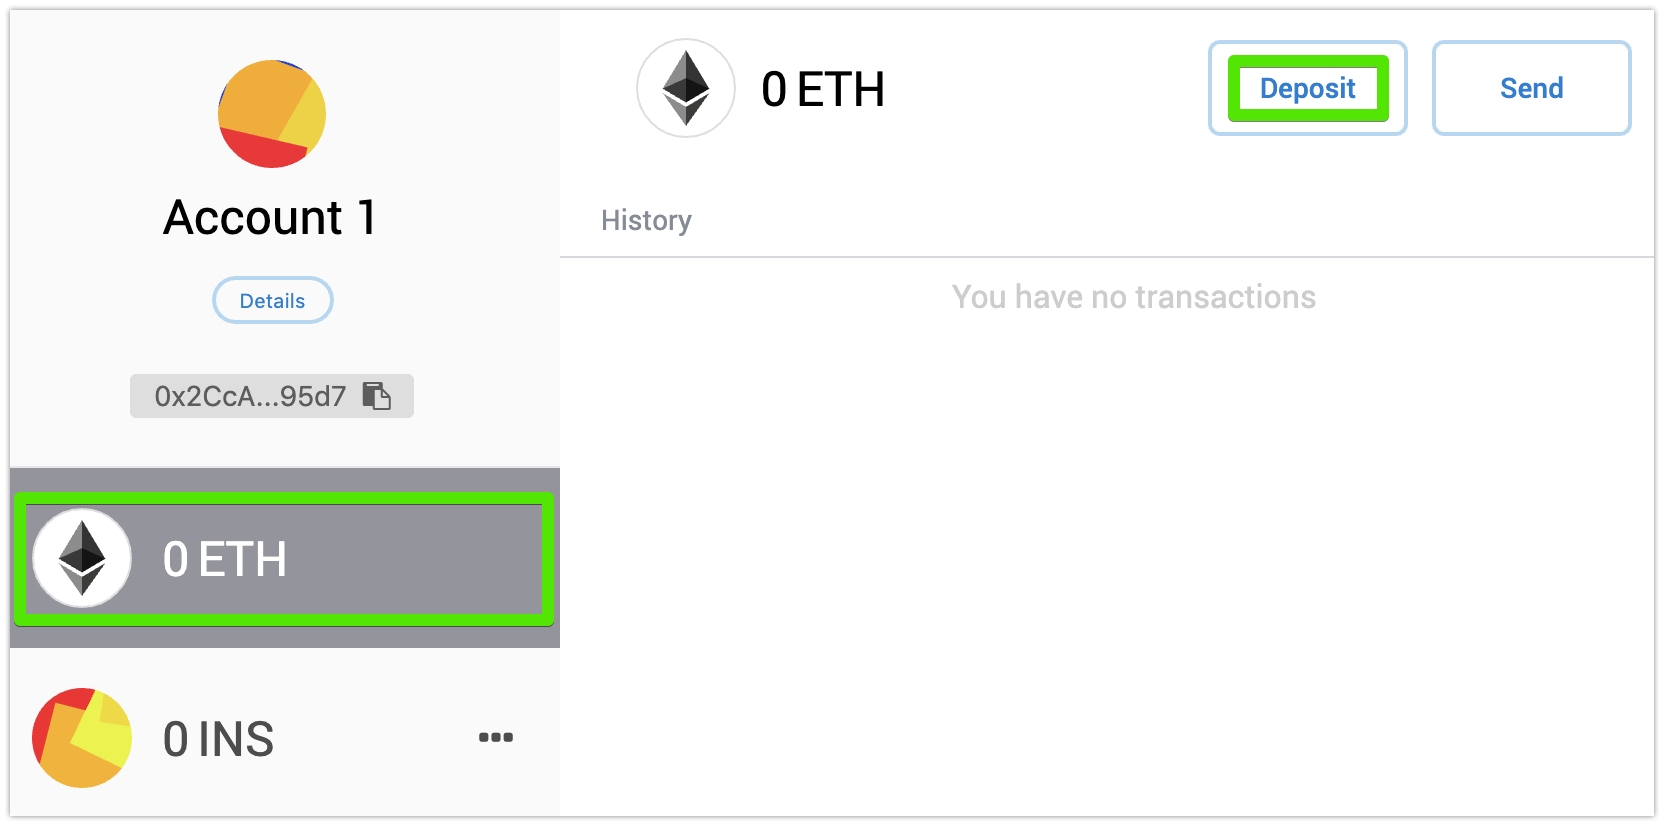
In the MetaMask wallet, first, click the ETH tab, then Deposit.
In the Deposit Ether window, click Get Ether next to Test Faucet:
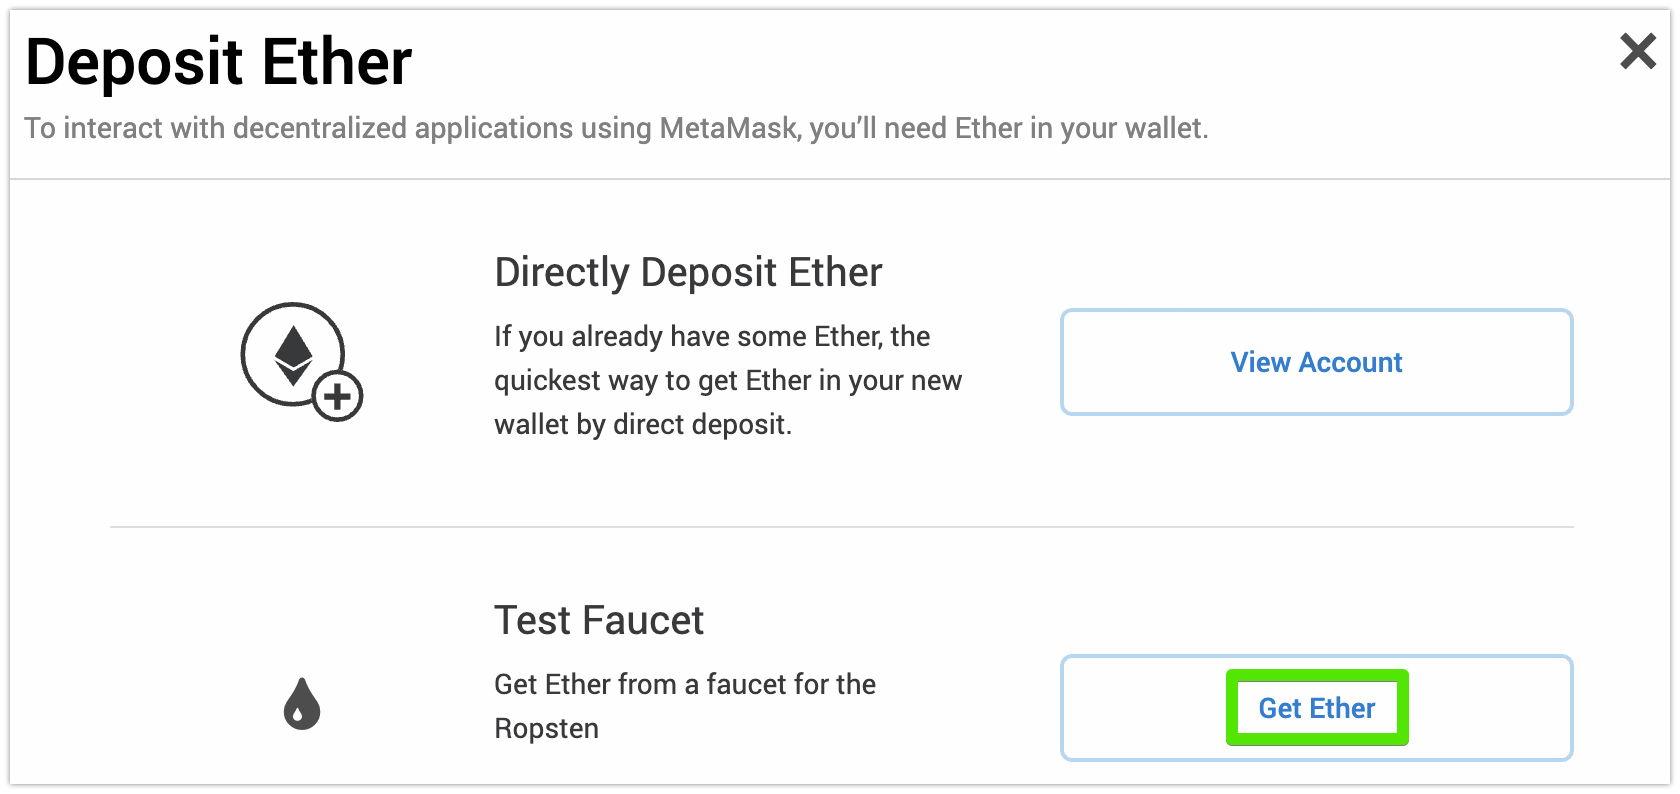
This opens the MetaMask Ether Faucet page.
On the opened page, click request 1 ether from faucet:

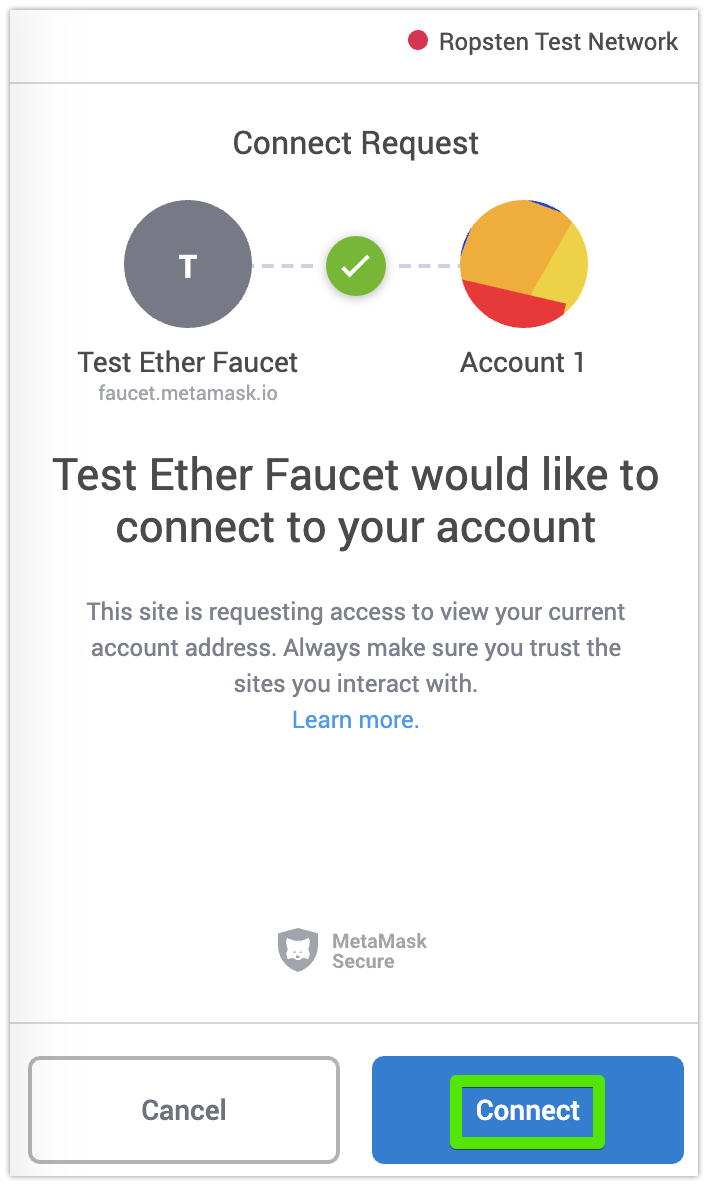
MetaMask will ask you to connect the request in the newly opened window. Click Connect:
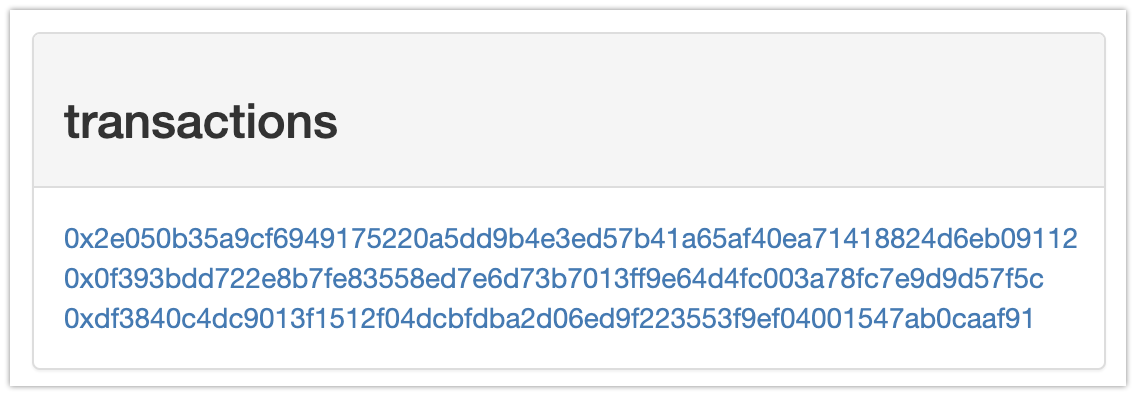
Once connected, you can click request 1 ether from faucet several times more (maximum 6). The corresponding transaction entries will appear below:
Wait several seconds to let the transactions be processed by the test network and return to the MetaMask wallet.
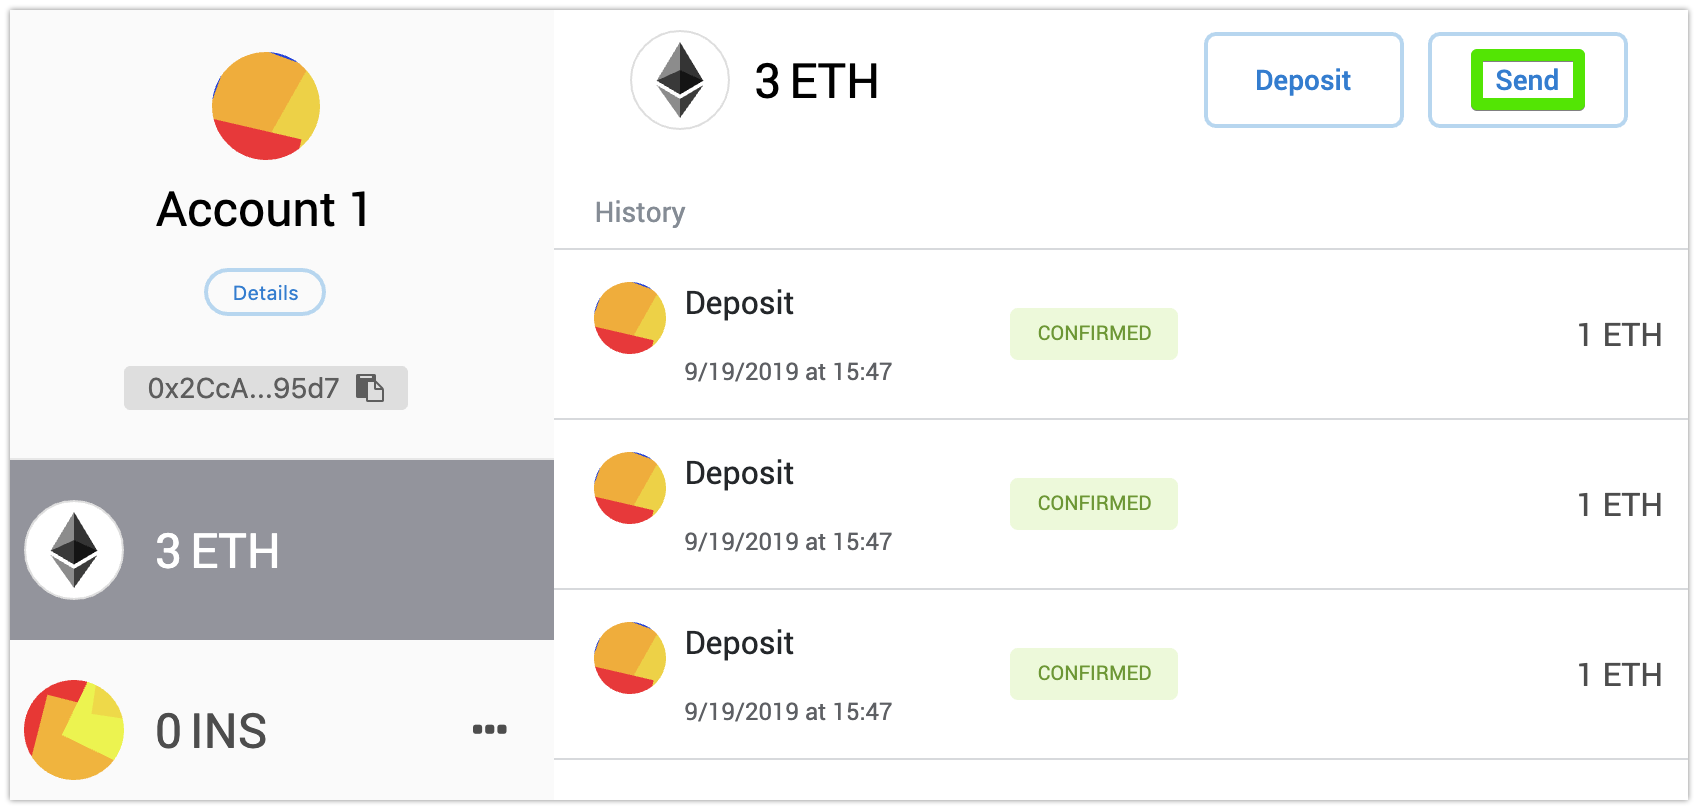
In the MetaMask wallet’s History, the confirmed transactions will appear and your balance will be updated. Click Send:
Again, copy the INS token contract address—click the copy icon
in the right corner of the following code block:0x7e94f2be613c6846c40325b0f2712269a0d61d10On the Add Recipient screen, paste the copied address to the search field:

The MetaMask wallet will recognize the INS token contract and display the transfer details:
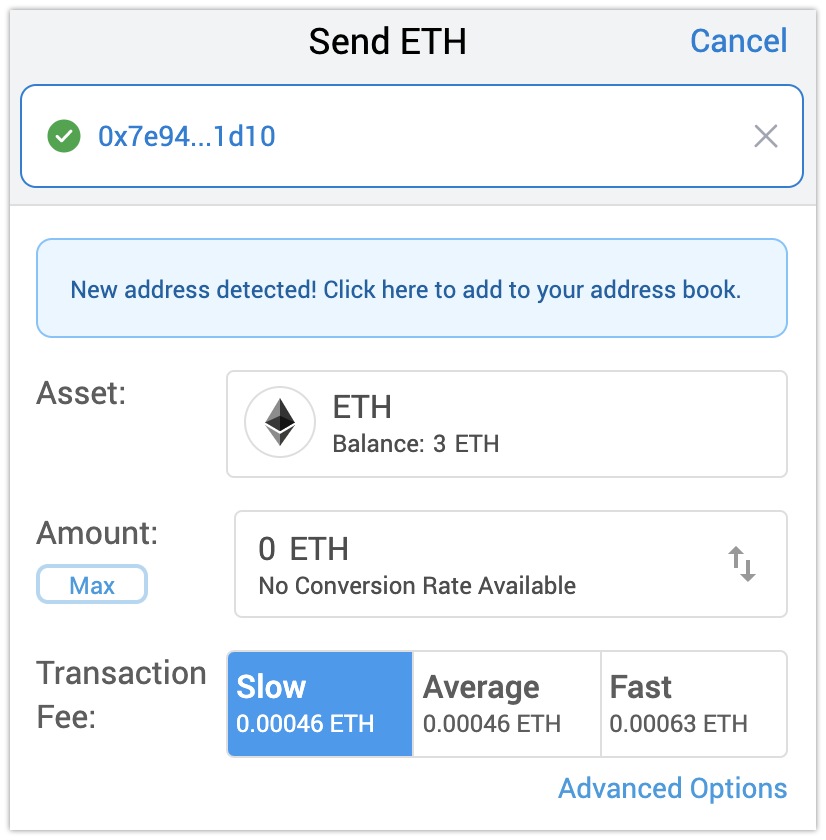
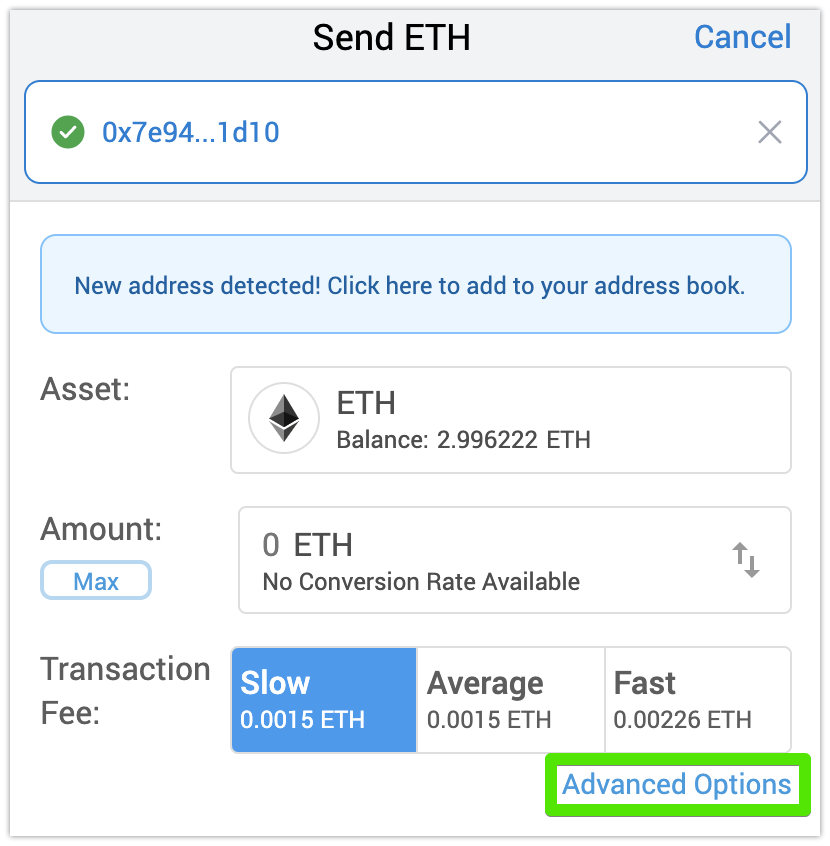
On the Send ETH screen, you don’t need to send actual ETH to the token contract but a small amount of ETH will be automatically subtracted to pay for transaction processing.
However, setting the correct gas value is required. To set it, click Advanced Options:
On the Customize Gas screen, set the Gas Limit to
80000(eighty thousand) and click Save: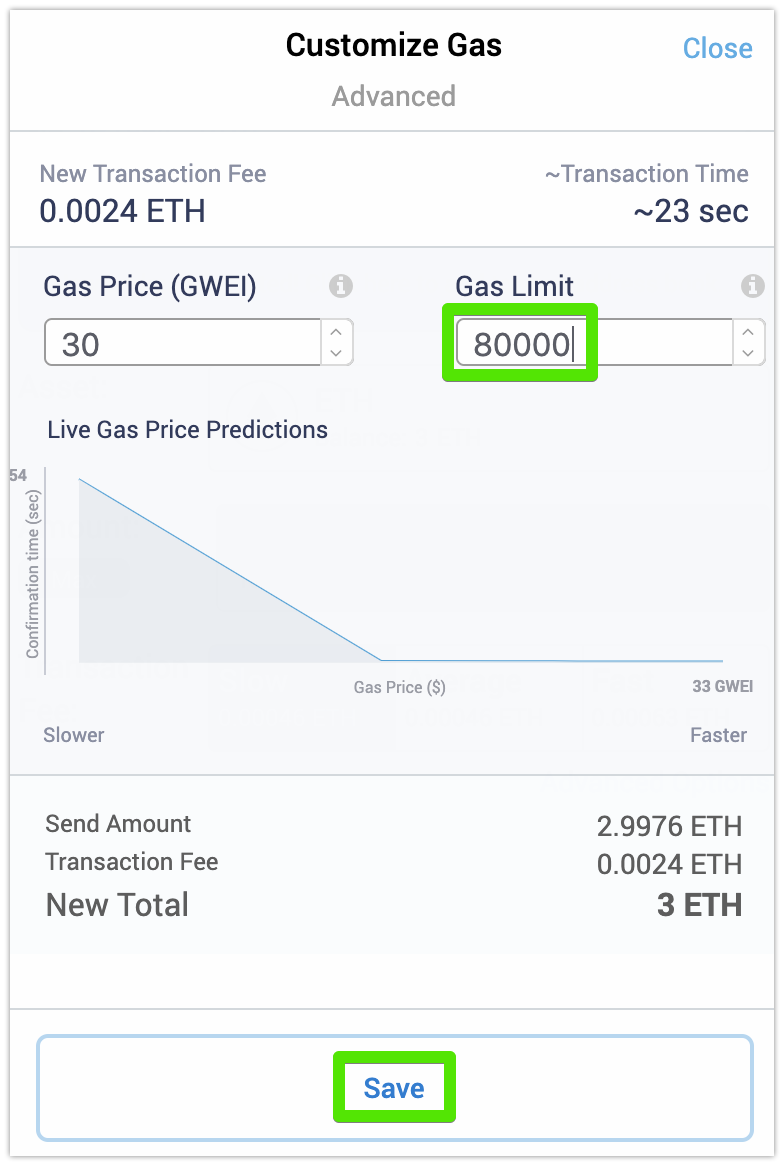
Caution
If the gas limit value is lower than 80,000, the token contract will fail.
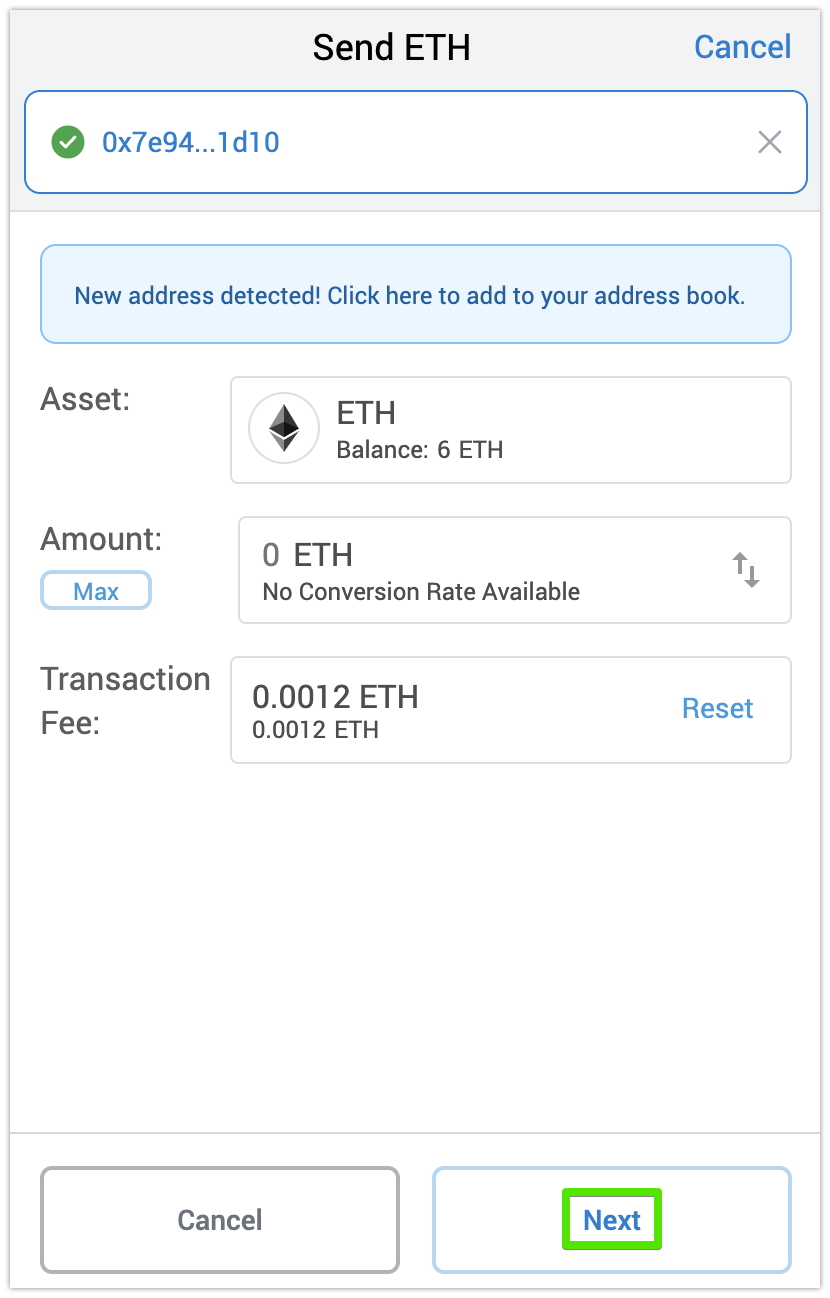
Back on the Send ETH screen, click Next:
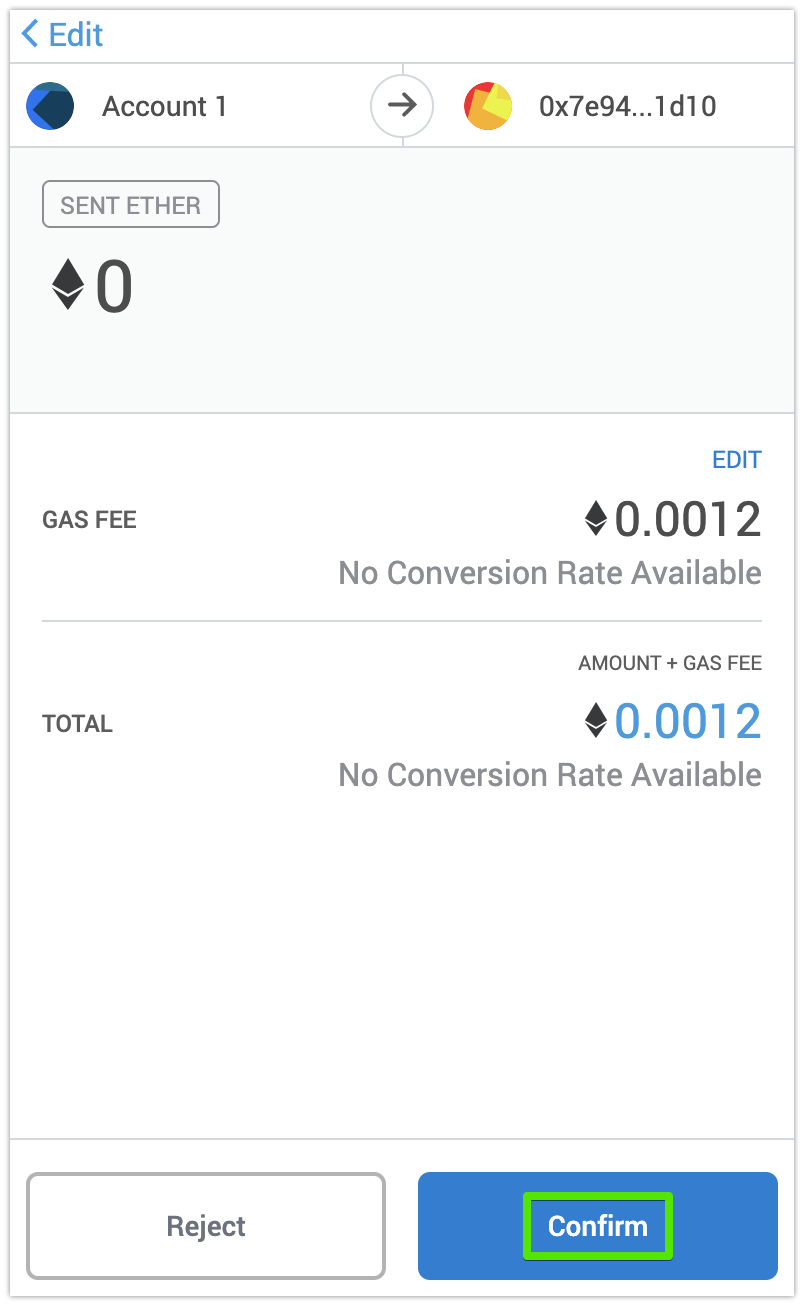
And, on the next screen, click Confirm:
Repeat the procedure of sending ETH to INS token contract several more times to acquire enough test INS tokens.
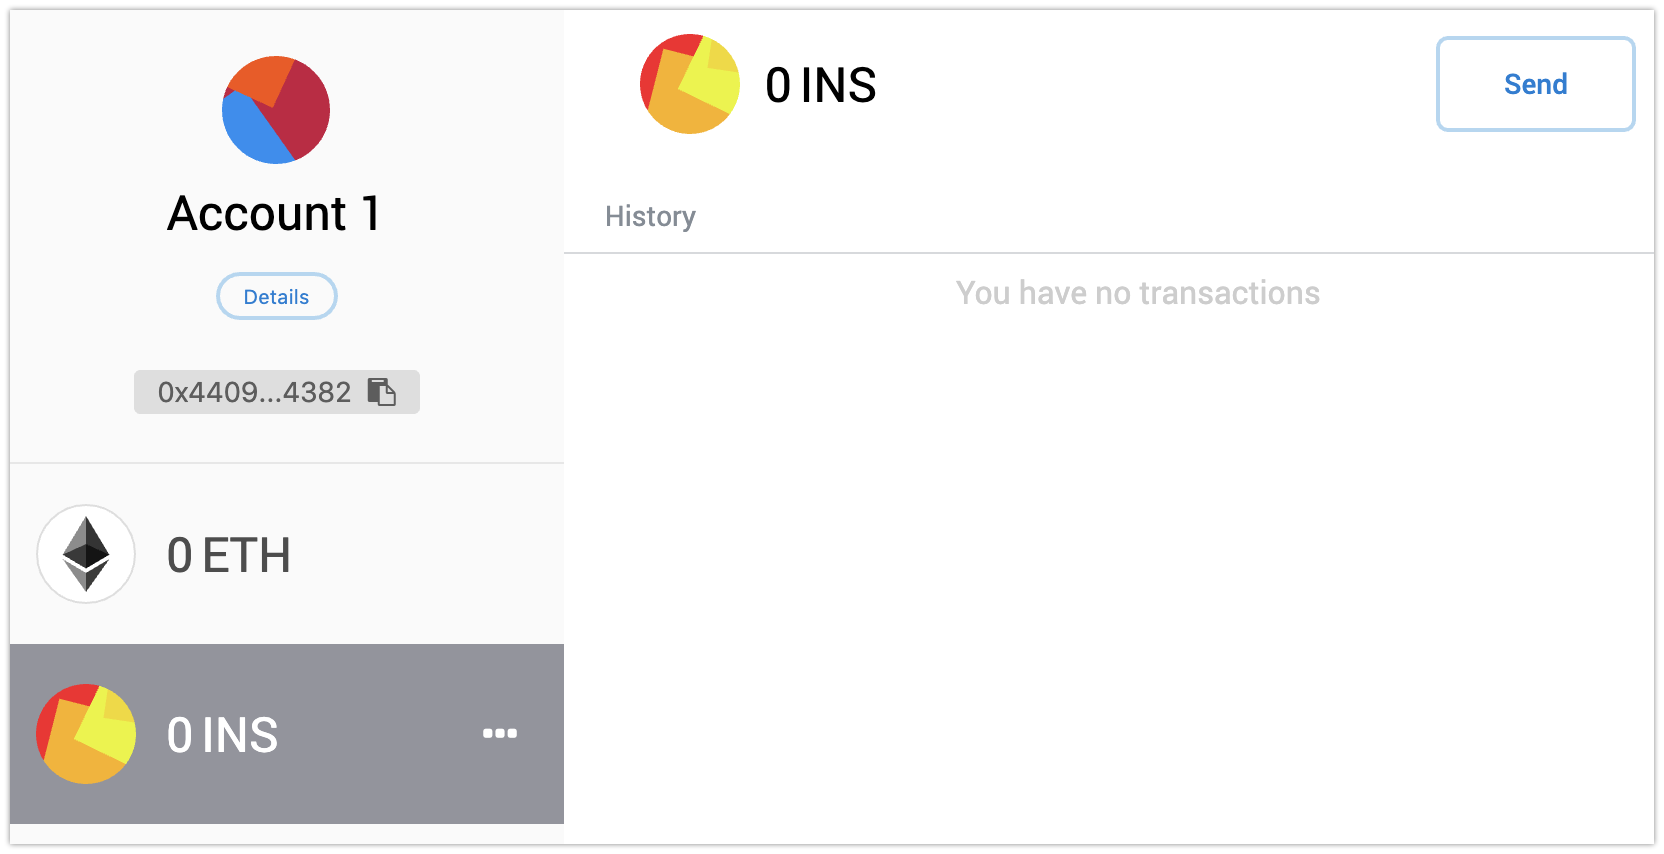
Once the corresponding transactions are confirmed, the MetaMask wallet is set up to operate test INS tokens:
Next, migrate test INS token to the Insolar network. The migration will automatically swap the test INS tokens to test XNS coins.
Migrating test INS tokens and swapping them to test XNS coins
To migrate the test INS tokens and swap them to XNS coins:
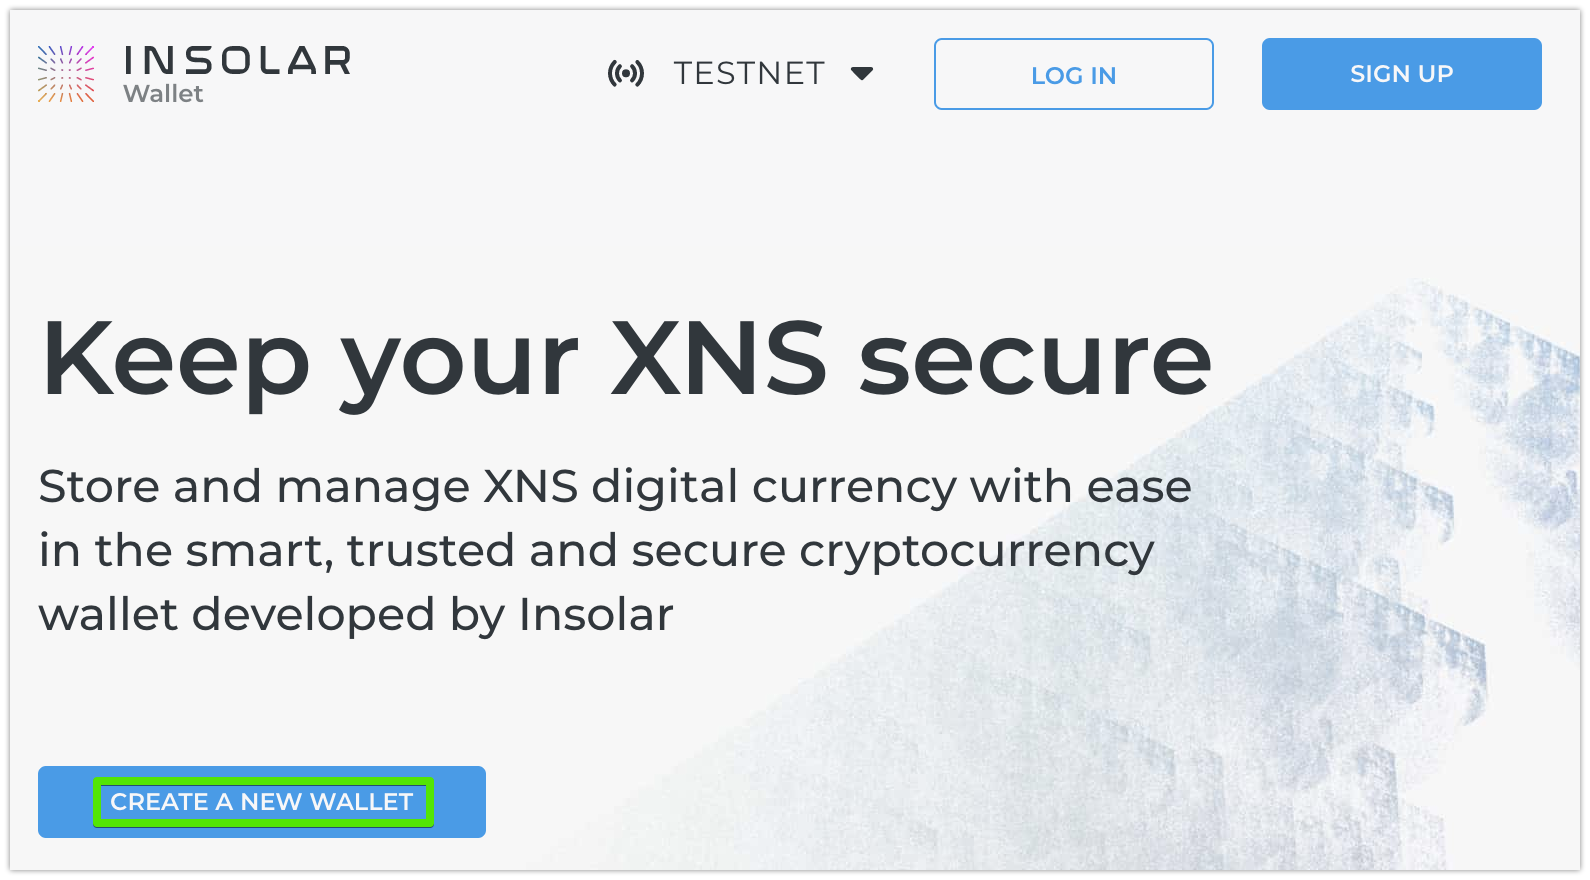
Open the Insolar Wallet website and make sure to select TESTNET from the drop-down list.
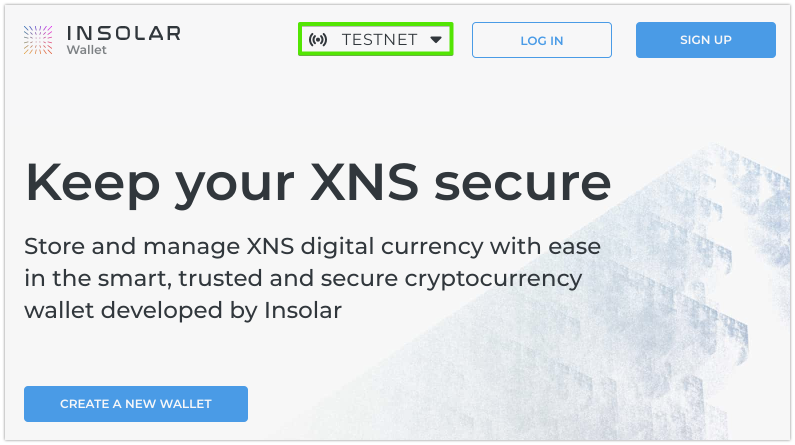
Click CREATE A NEW WALLET:
This opens a Wallet creation tutorial. Read through it attentively.
Upon creation, your wallet takes care of security for you:
Generates a secret backup phrase and private key using randomization. They are synonymous in function.
Encrypts the key with your password and puts it in a keystore file. You can use this file to access your wallet and authorize operations.
Ensures that you make a record of the secret backup phrase. Using this phrase, you can restore access to your wallet in case you lose the private key or the keystore file and your password.
Caution
You are solely responsible for keeping your funds as no one else can restore access to your wallet. Insolar does not store your credentials, encrypted or otherwise.
On the Create a new wallet page:
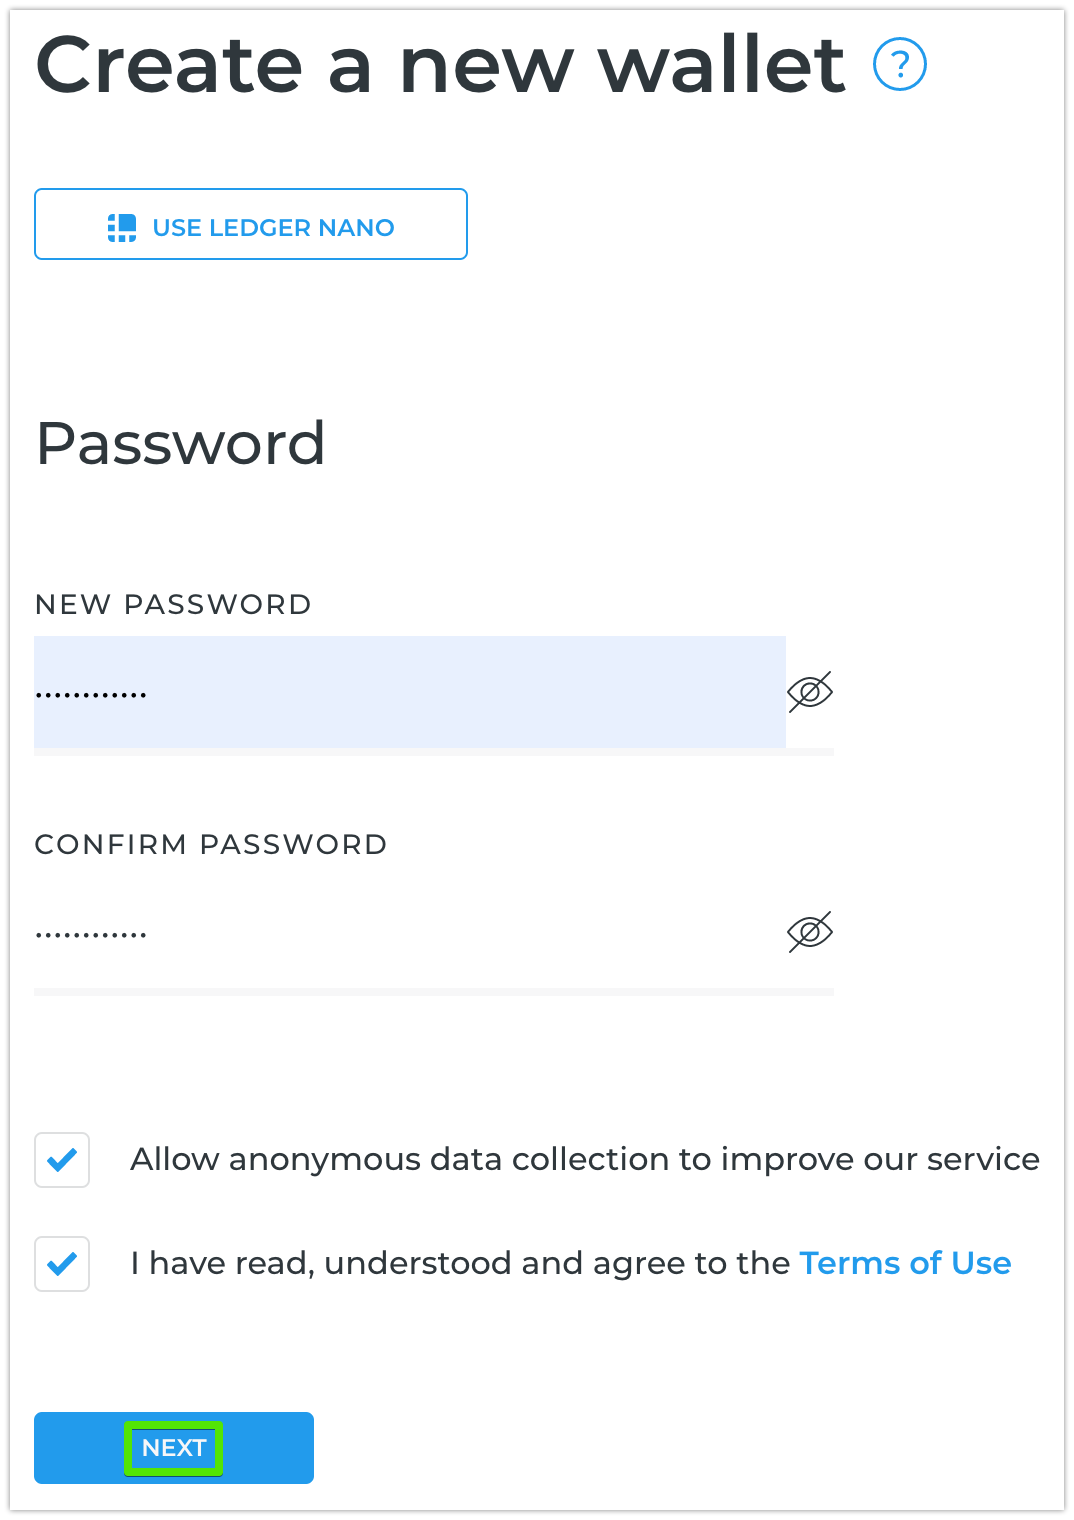
Enter a new password. It should be at least 8 characters long and contain a mix of numbers, uppercase, and lowercase letters.
Re-enter the password to confirm it.
Agree to the “Term of Use”.
Allow anonymous data collection if you want to help us improve the service.
Click NEXT.
On the next screen, click REVEAL TEXT to see the backup phrase:
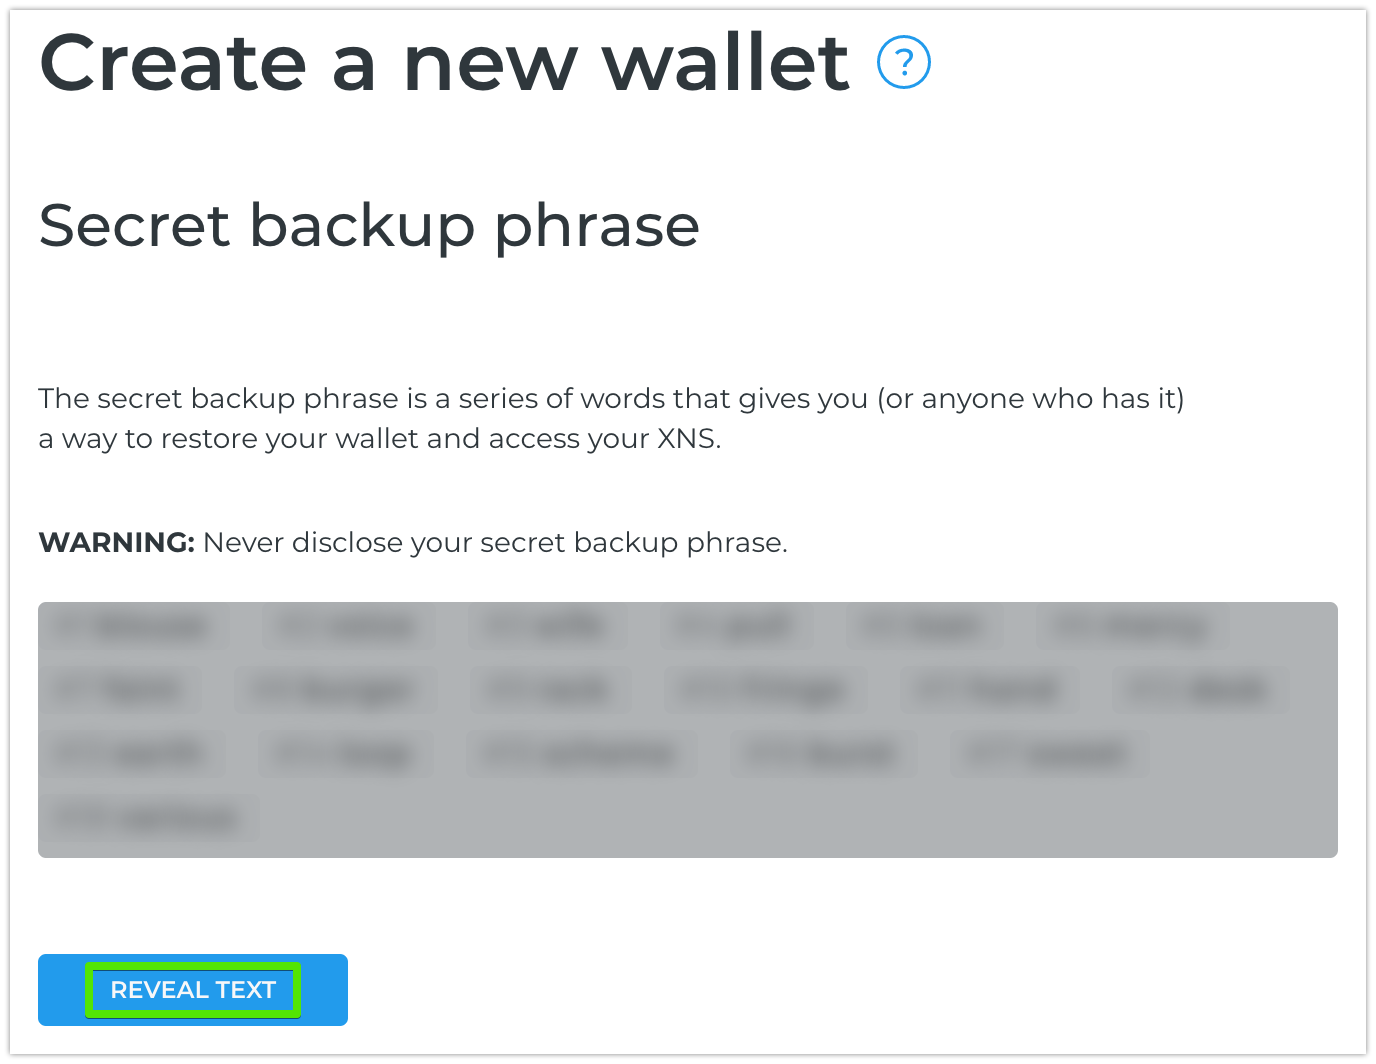
The secret backup phrase is a series of words that store all the information needed to recover Insolar Wallet. The secret backup phrase and private key are synonymous in function.
Warning
Never disclose your secret backup phrase (or private key).
Tip
Security tips:
Store the phrase in a password manager.
Write the phrase down on several pieces of paper and store them in different places.
Memorize the phrase.
Once you have secured the backup phrase, click NEXT.
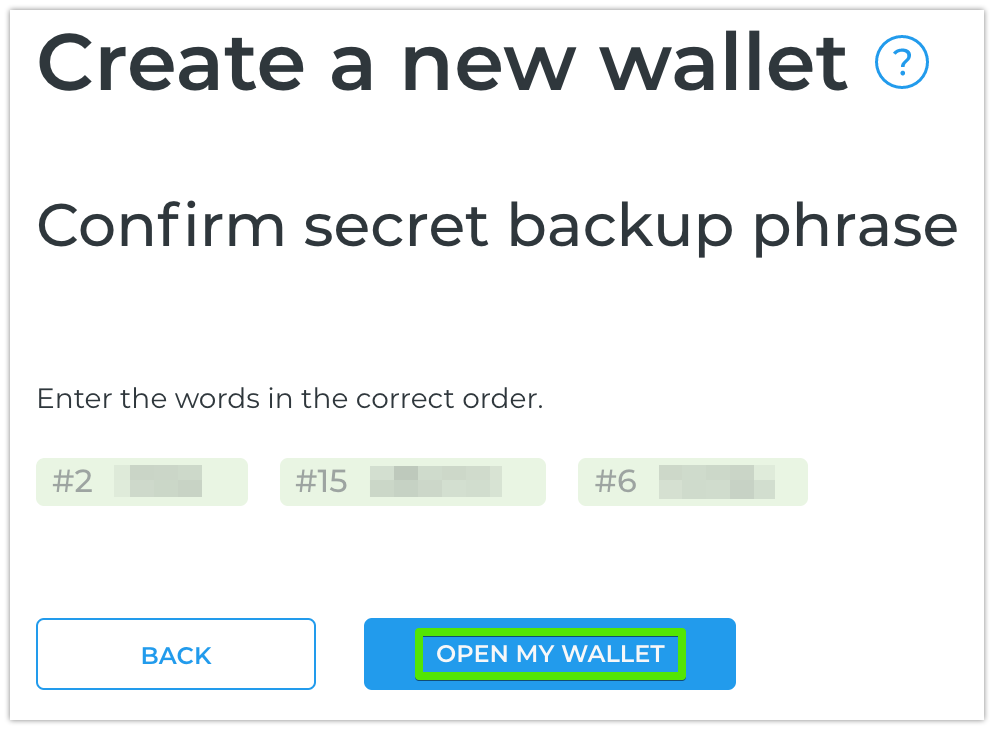
On the next screen, enter the requested words in the correct order and click OPEN MY WALLET:
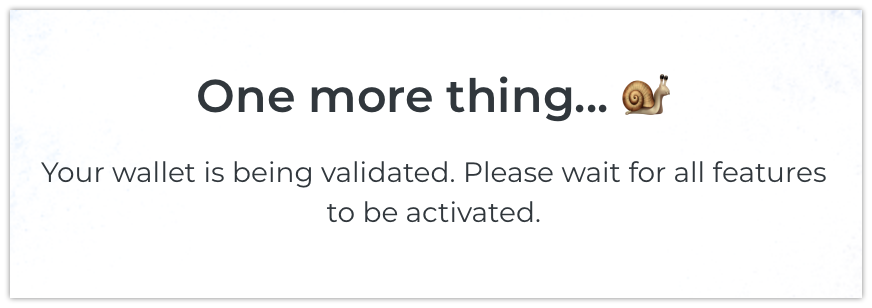
Wait for the wallet validation to complete and all features to become available:
Once the wallet is created, receive congratulations from Insolar:
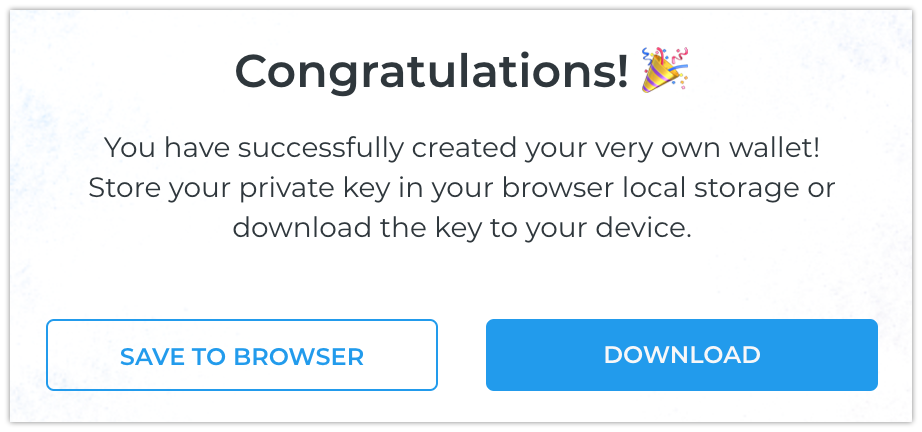
And save the keystore file in one of the following ways:
Click SAVE TO BROWSER to save it to your browser local storage. Keeping the file locally allows easier access from the browser on the device you are using.
Click DOWNLOAD to save it to your device. In this case, you can later move it to another device via, for example, a USB drive.
Later, you can log in using one of the following:
(Recommended) Your password and the keystore file saved to your browser.
Your password and the keystore file saved to your device.
Hardware wallet (such as Ledger Nano X or S).
(Weakest safety level) Unencrypted private key.
Either way, Insolar Wallet does not store your private key. Instead, it uses the private key provided every time to authorize login and operations. While logged in, you can copy your unencrypted private key, but keep in mind, this is its most vulnerable form.
In Insolar Wallet, open the SWAP tab and copy your migration address.
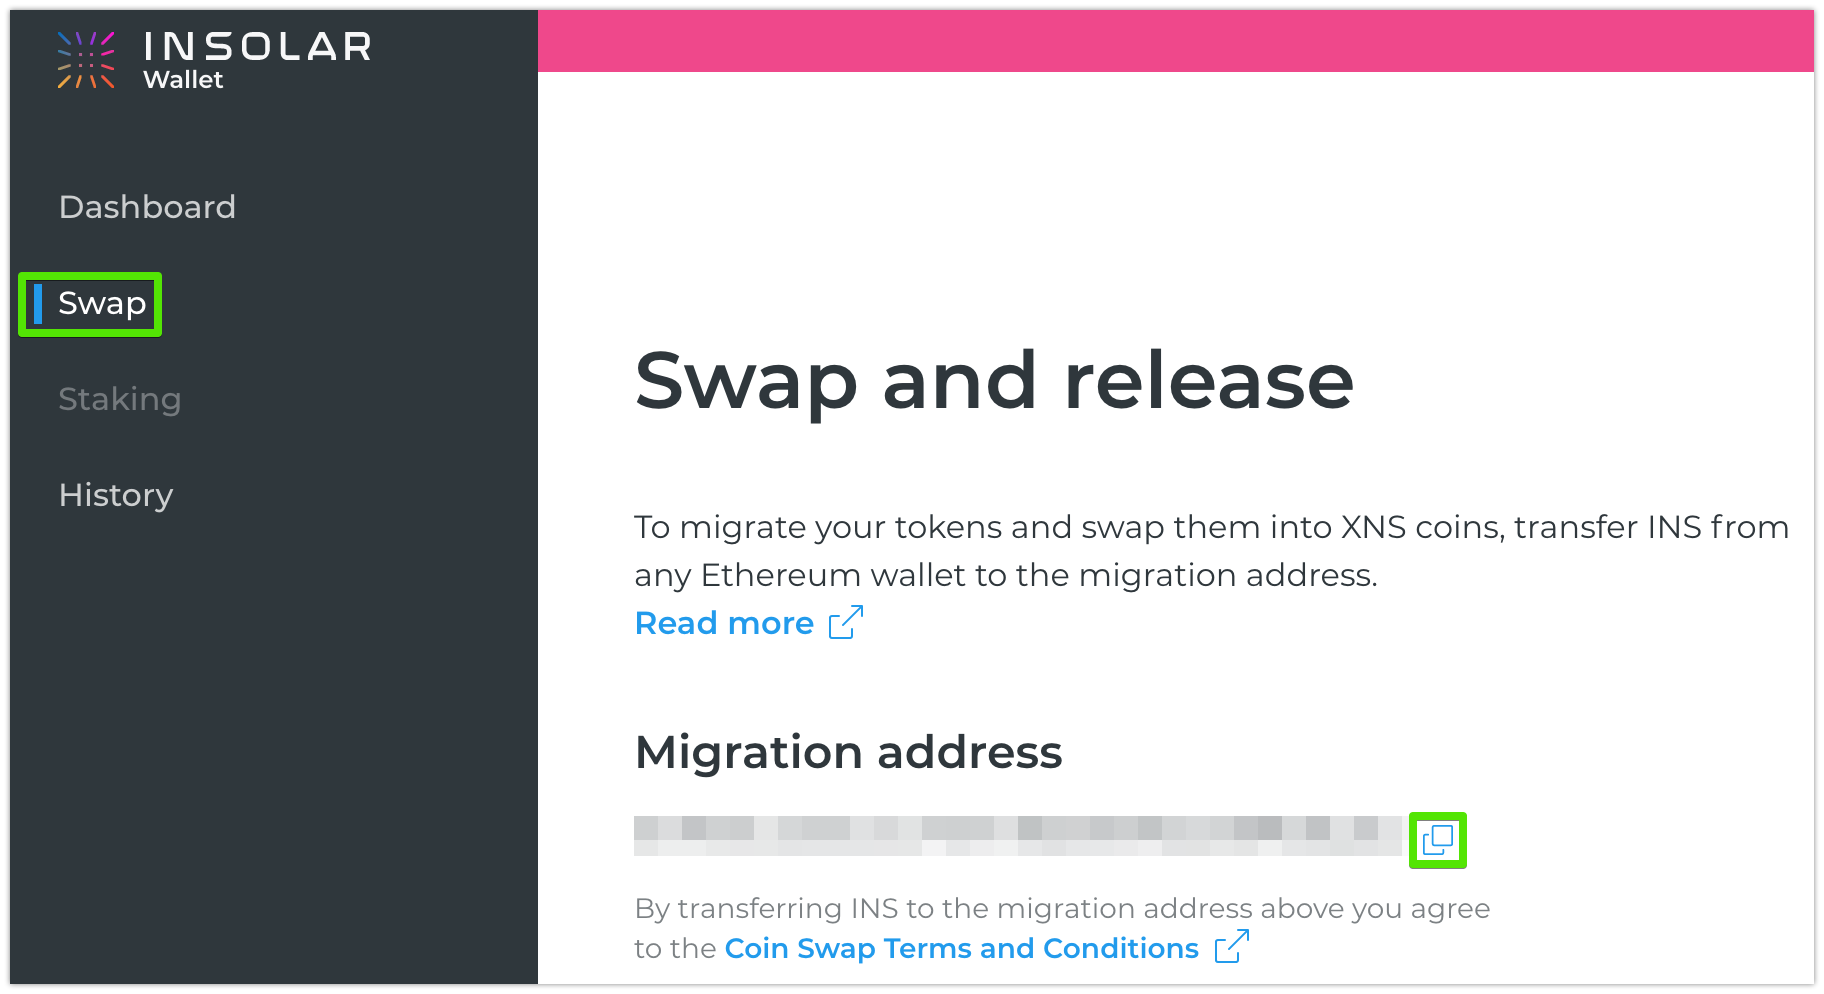
On the SWAP tab, click Copy migration address.
After that, return to the MetaMask wallet.
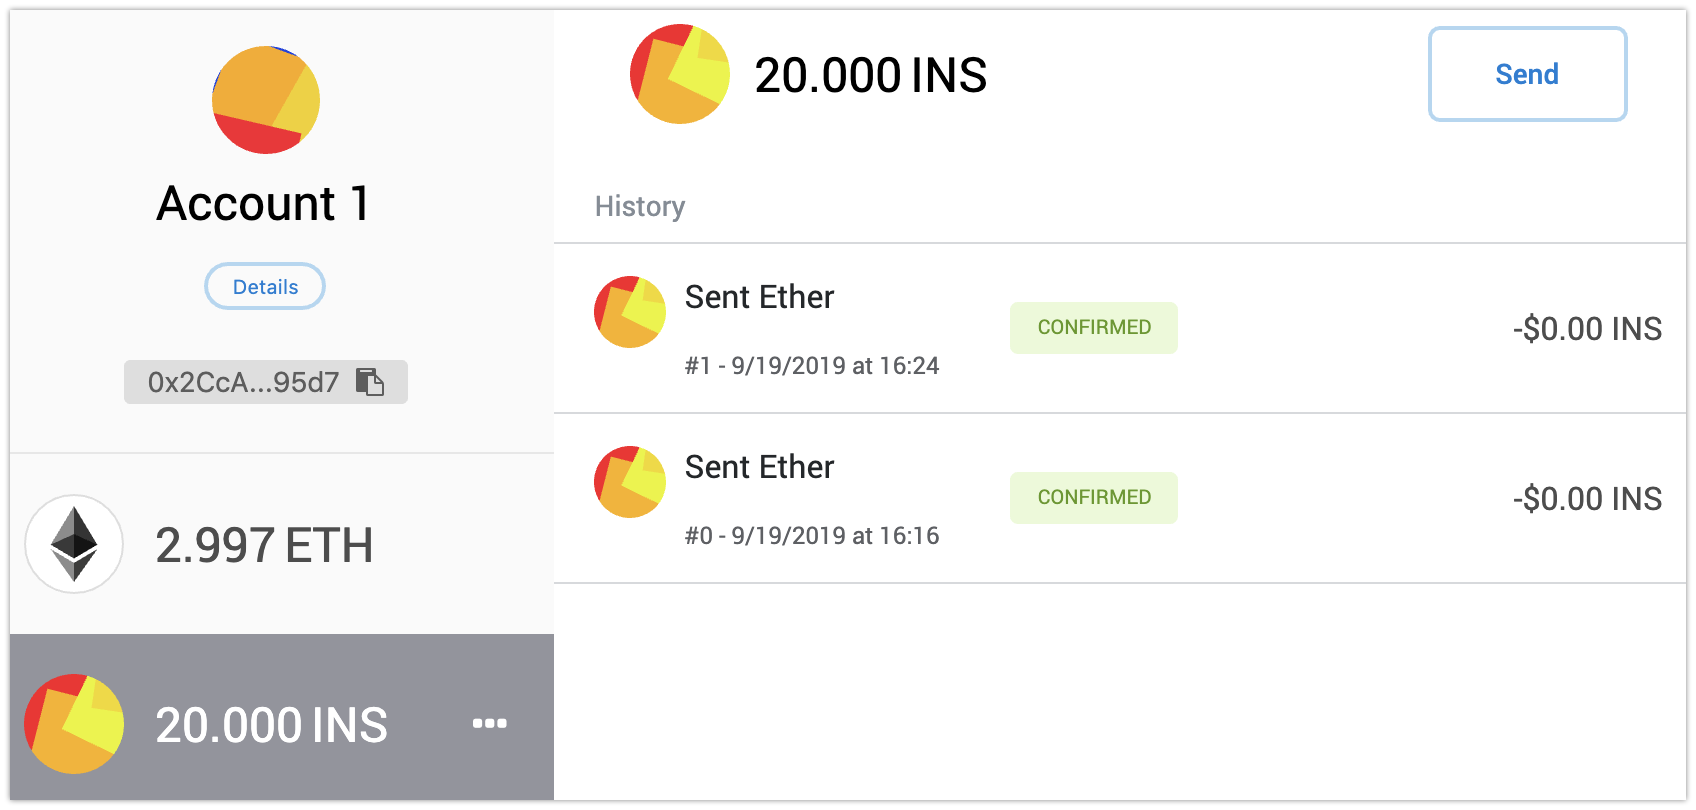
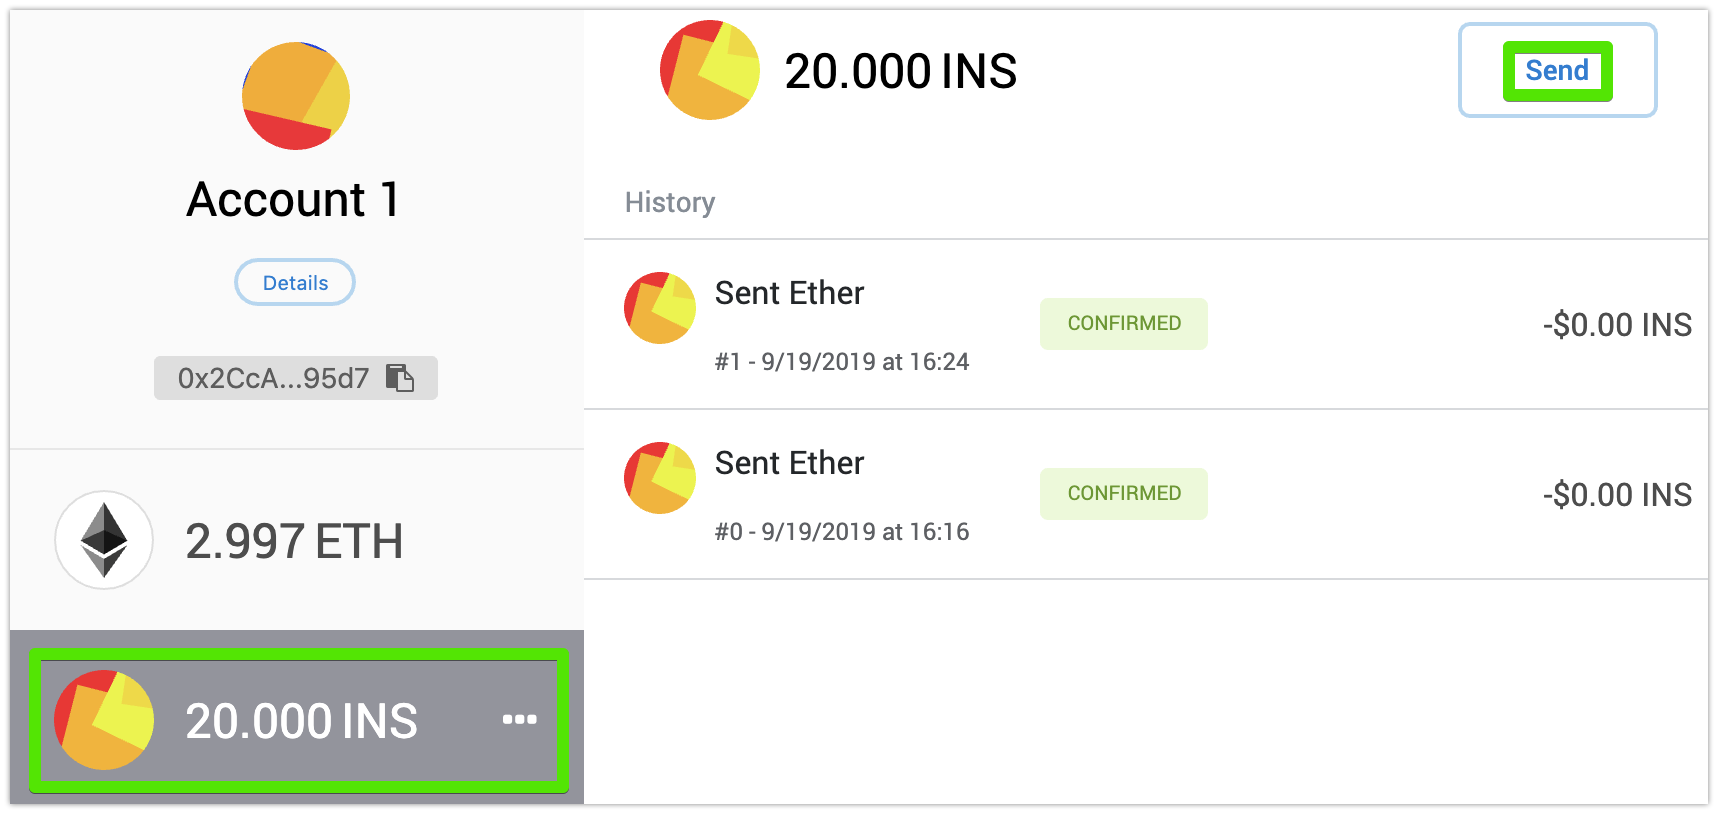
In the MetaMask wallet, open the INS tab and click Send:
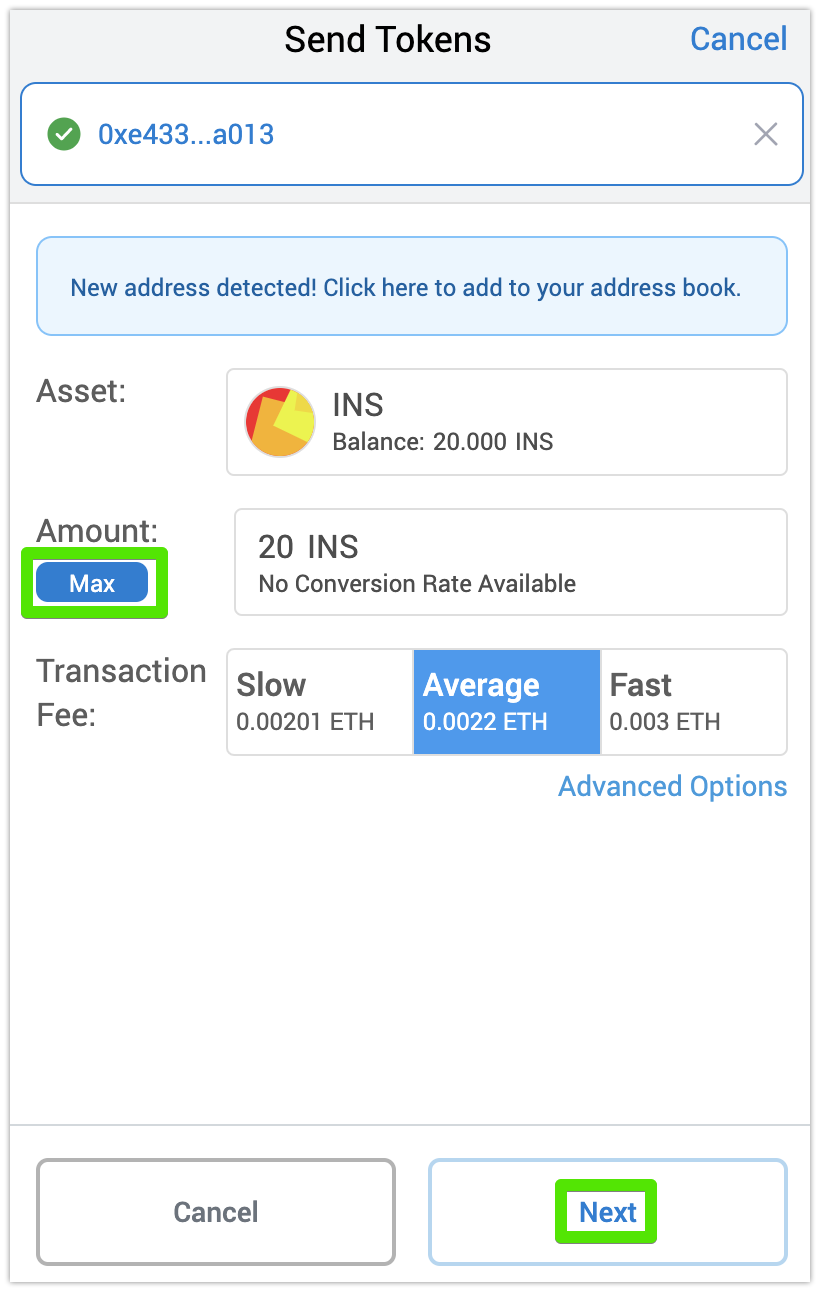
On the Add Recipient screen, paste the copied migration address to the search field:
On the Send Tokens screen, first, click Max, then Next:
And Confirm the transaction:
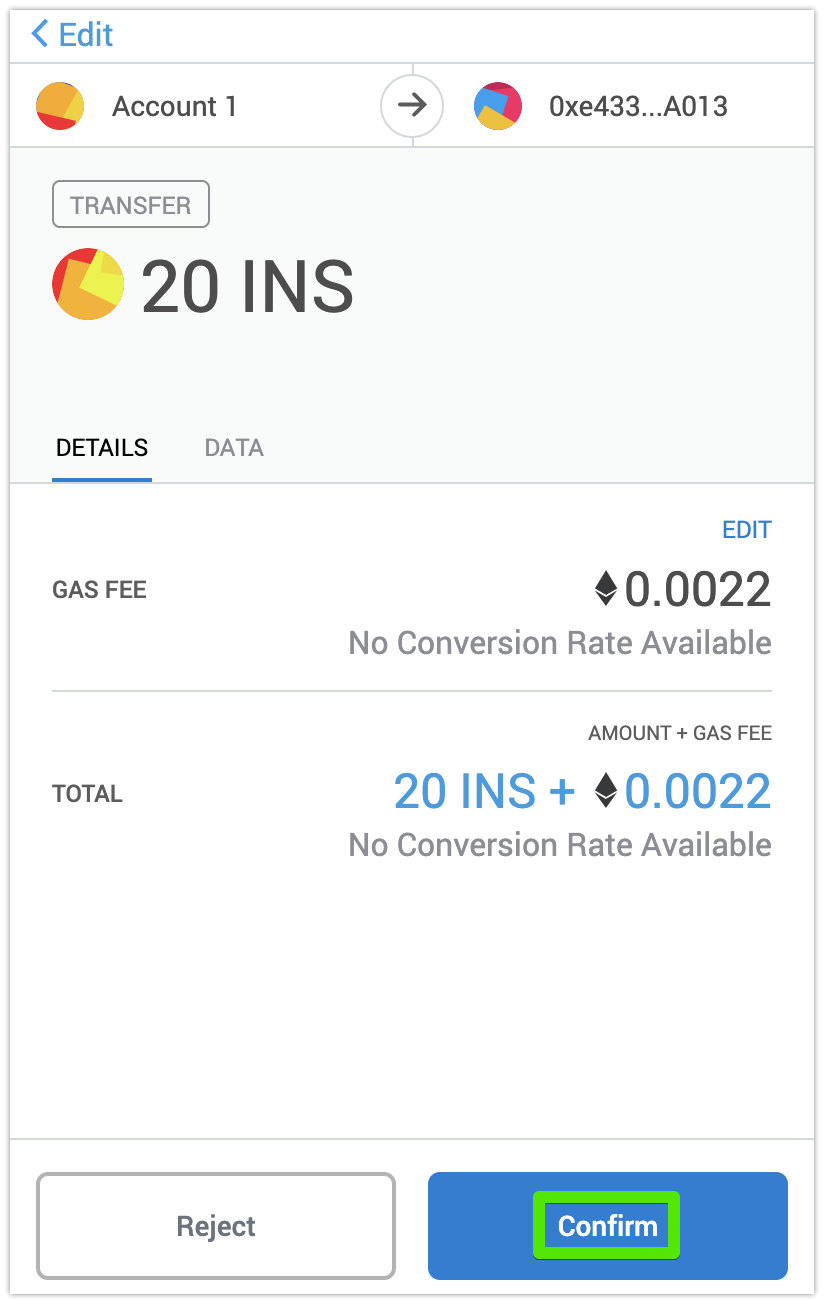
The migration process may take some time.
Once the transaction is processed by the Ropsten test network, your test XNS coins will appear in Insolar Wallet:

This concludes the migration test.